Trikdis FLEXi Keypad SK-LCD button – Skrócona instrukcja użytkow
- 01.07.2025
- Producent: Trikdis

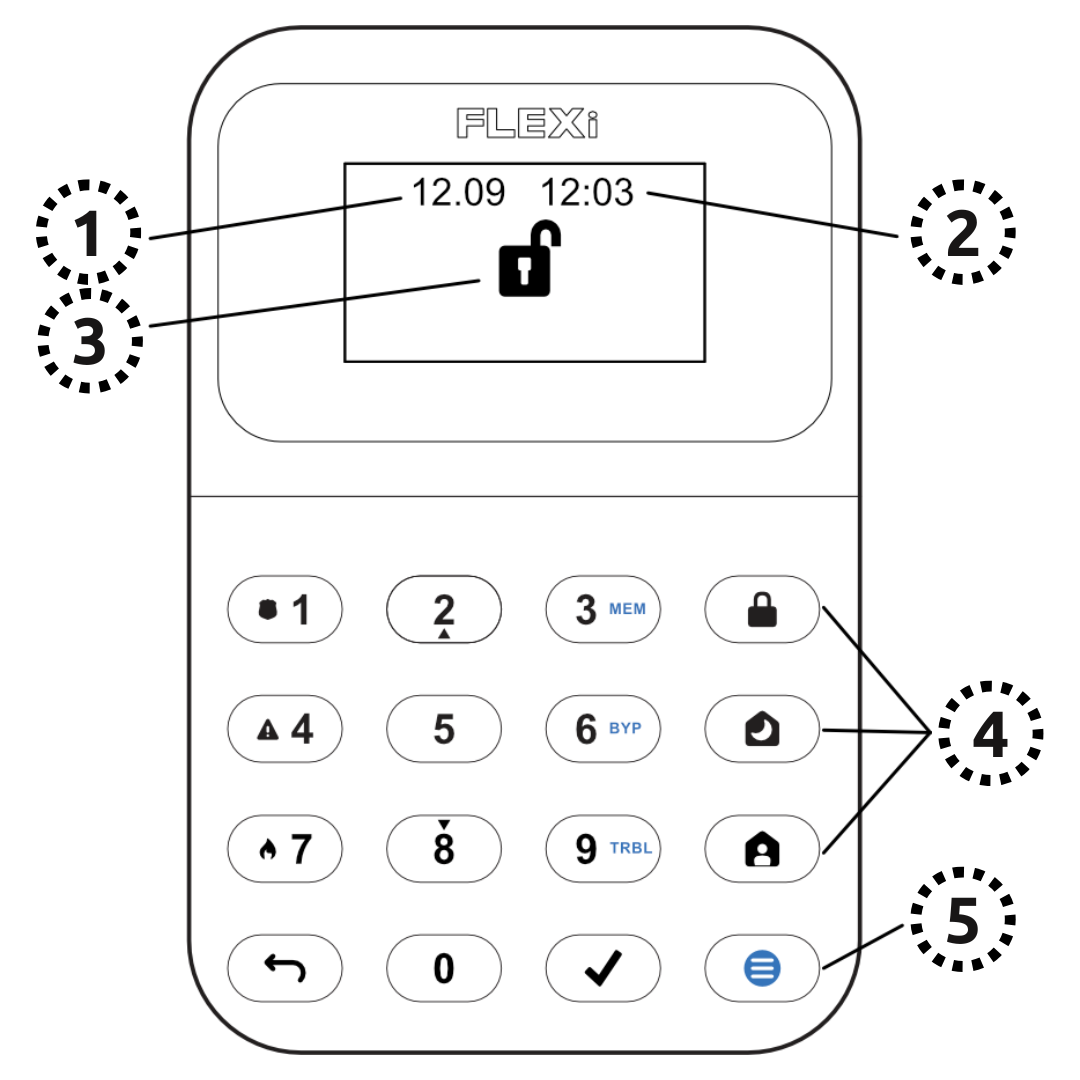
Opis funkcji
- Date
- Time
- Area Status Indication
- Area Control Buttons
- Menu Button
Alarm System (Away) ARMING
- Make sure no zones are violated.
- Naciśnij [

 ].
]. - Enter your user code.
- Wybierz strefa.
- Naciśnij [
 ].
]. - Leave the area within the exit delay time.
When the system is armed, the  icon appears on the display.
Alarm System DISARMING
- Enter your user code.
- Wybierz strefa.
- Naciśnij [].
When the system is disarmed, the  icon appears on the display.
Tryb NOC / SEN
The building's perimeter is secured, free movement inside is allowed. Alarms upon door/window opening.
- Naciśnij [
 ].
]. - Enter your user code.
- Wybierz strefa.
- Naciśnij [].
- NIGHT arming activates immediately.
The  icon appears on the display when NIGHT arming is active.
Tryb STAY (W domu)
There is an entry delay. Free movement inside is allowed.
- Naciśnij [
 ].
]. - Enter your user code.
- Wybierz strefa.
- Naciśnij [].
- STAY arming activates immediately.
The  icon appears on the display when STAY arming is active.
To change the area status, simply enter the user code and select the desired area. To clear entered commands, press the [ ].
].
Adding a new code / Modifying an existing one:
- Naciśnij [
 ], then the [0].
 - Wprowadź kod główny (domyślny: 1234).
- Enter the two-digit serial number of the user (e.g., 02).
- Wprowadź nowy kod dwukrotnie.
- Select the areas assigned to the user.
- Naciśnij [].
To exit, press the [] button again.
Uwaga
- Master code serial number: [01]
- Codes consist of 4 digits.
Deleting a user code:
- Naciśnij [], then the [0].
- Wprowadź kod główny.
- Enter the two-digit serial number of the user (e.g., 02).
- Naciśnij []. (A confirmation sound will be heard.)
- Naciśnij [].
To exit, press the [] button again.
Aktywacja blokady:
- Naciśnij [], then the [6].
- Enter your user code.
- Wprowadź dwucyfrowy numer(y) strefy(stref). Możesz wprowadzić kilka, np. 05 a następnie 11.
- Naciśnij []. ( ikona pojawia się na wyświetlaczu, jeśli strefa jest zablokowana.)
Dezaktywacja blokady:
Powtórz kroki aktywacji.
Wysłanie sygnału alarmowego:
- Policja – przytrzymaj przycisk [1] przez 3 sekundy
- Pogotowie Aid – przytrzymaj przycisk [4] przez 3 sekundy
- Straż pożarna – przytrzymaj przycisk [7] przez 3 sekundy
Uwaga: Działa tylko z aktywnym abonamentem zdalnego monitoringu.
Reset czujników pożaru (dymu):
- Naciśnij [] button for 3 seconds.
Uwaga: Czujniki pożaru i/lub dymu nie resetują się automatycznie po alarmie. Należy je zresetować ręcznie.
Button Brightness
- Naciśnij [], then buttons [5] and [3].
- Adjust the brightness with buttons [2] / [8].
- To save [], to exit [].
LCD Display Brightness
- Naciśnij [], then buttons [5] and [2].
- Adjust the brightness with buttons [2] / [8].
- To save [], to exit [].
Keypad Volume
- Naciśnij [], then buttons [5] and [1].
- Adjust the volume with buttons [2] / [8].
- To save [], to exit [].
Disabling Standby Light
This setting controls whether the keypad backlight illuminates even when the device enters standby mode (i.e., has not been pressed for a while).
- Naciśnij [], then buttons [5] and [4].
- By pressing button [1], you can set the backlight to illuminate in standby mode, while with button [2], you can set it to turn off.
- To save [], to exit [].


Klawiatura „SK-LED button" obsługuje 64 strefy i 8 strefy. Partycje można przypisywać do poszczególnych klawiatur. Dostępne od FW:SP3_xxx4_0121 centrali.
Tagi:
Powiązane artykuły
Przedstawiamy FLEXi SP3 – najlepsza inteligentna centrala alarmo
- 10.08.2020
Trikdis FLEXi SP3: inteligentna centrala alarmowa ze zintegrowanym komunikatorem – wszechstronna, szybka i opłacalna.
Czytaj więcej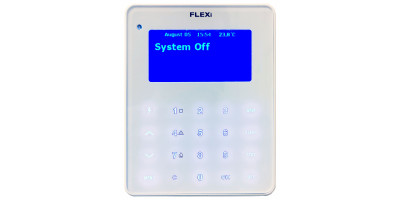
Proces aktualizacji oprogramowania klawiatury FLEXi LCD
- 06.03.2023
Przewodnik po aktualizacji oprogramowania klawiatury Trikdis FLEXi LCD.
Czytaj więcej
Trikdis FLEXi Keypad SK-LED button – Skrócona instrukcja użytkow
- 10.07.2025
Skrócona instrukcja klawiatury Trikdis FLEXi SK-LED button: załączanie, wyłączanie, zarządzanie kodami, blokada stref i funkcje alarmowe.
Czytaj więcejPowiązane produkty

Inteligentny panel alarmowy Trikdis FLEXi SP3 Ethernet
Trikdis FLEXi SP3 Ethernet to elastyczny, wszechstronny panel sterowania inteligentnym systemem alar..
€139,90 Cena netto: €113,74

Klawiatura Trikdis SK-LCD Button
Klawiatura FLEXi SK-LCD to niezawodne i przyjazne dla użytkownika urządzenie z wyświetlaczem LCD i f..
€67,90 Cena netto: €55,20